Organization setup
An organization is the top-level container for everything you do in Catchbase: integrations, campaigns, team members, and billing. This page walks through creating an organization, reviewing its settings, and inviting teammates. You do this once per Catchbase workspace. If an admin has already created your organization, skip ahead to inviting teammates.
Before you start
- An email address to sign in with. Catchbase supports email, Apple, and Google sign-in.
- Admin role on the organization is required to create an organization, change billing, and invite teammates.
Steps
Create the organization
-
Sign in to Catchbase. If you have no existing organization, the setup screen appears.
-
Enter an organization name, for example your company name. Click Continue. Expected outcome: the organization is created and you proceed to the trial screen.
-
On the trial screen, click Start Free Trial. Complete the Stripe checkout flow. Expected outcome: the subscription becomes active and you can open the dashboard. If not, please reach out to the support team.
Review your organization settings
- Go to Settings, Organization. The Organization Details tab opens by default. You see the organization name, organization ID, currency, status, and a Manage Billing button.
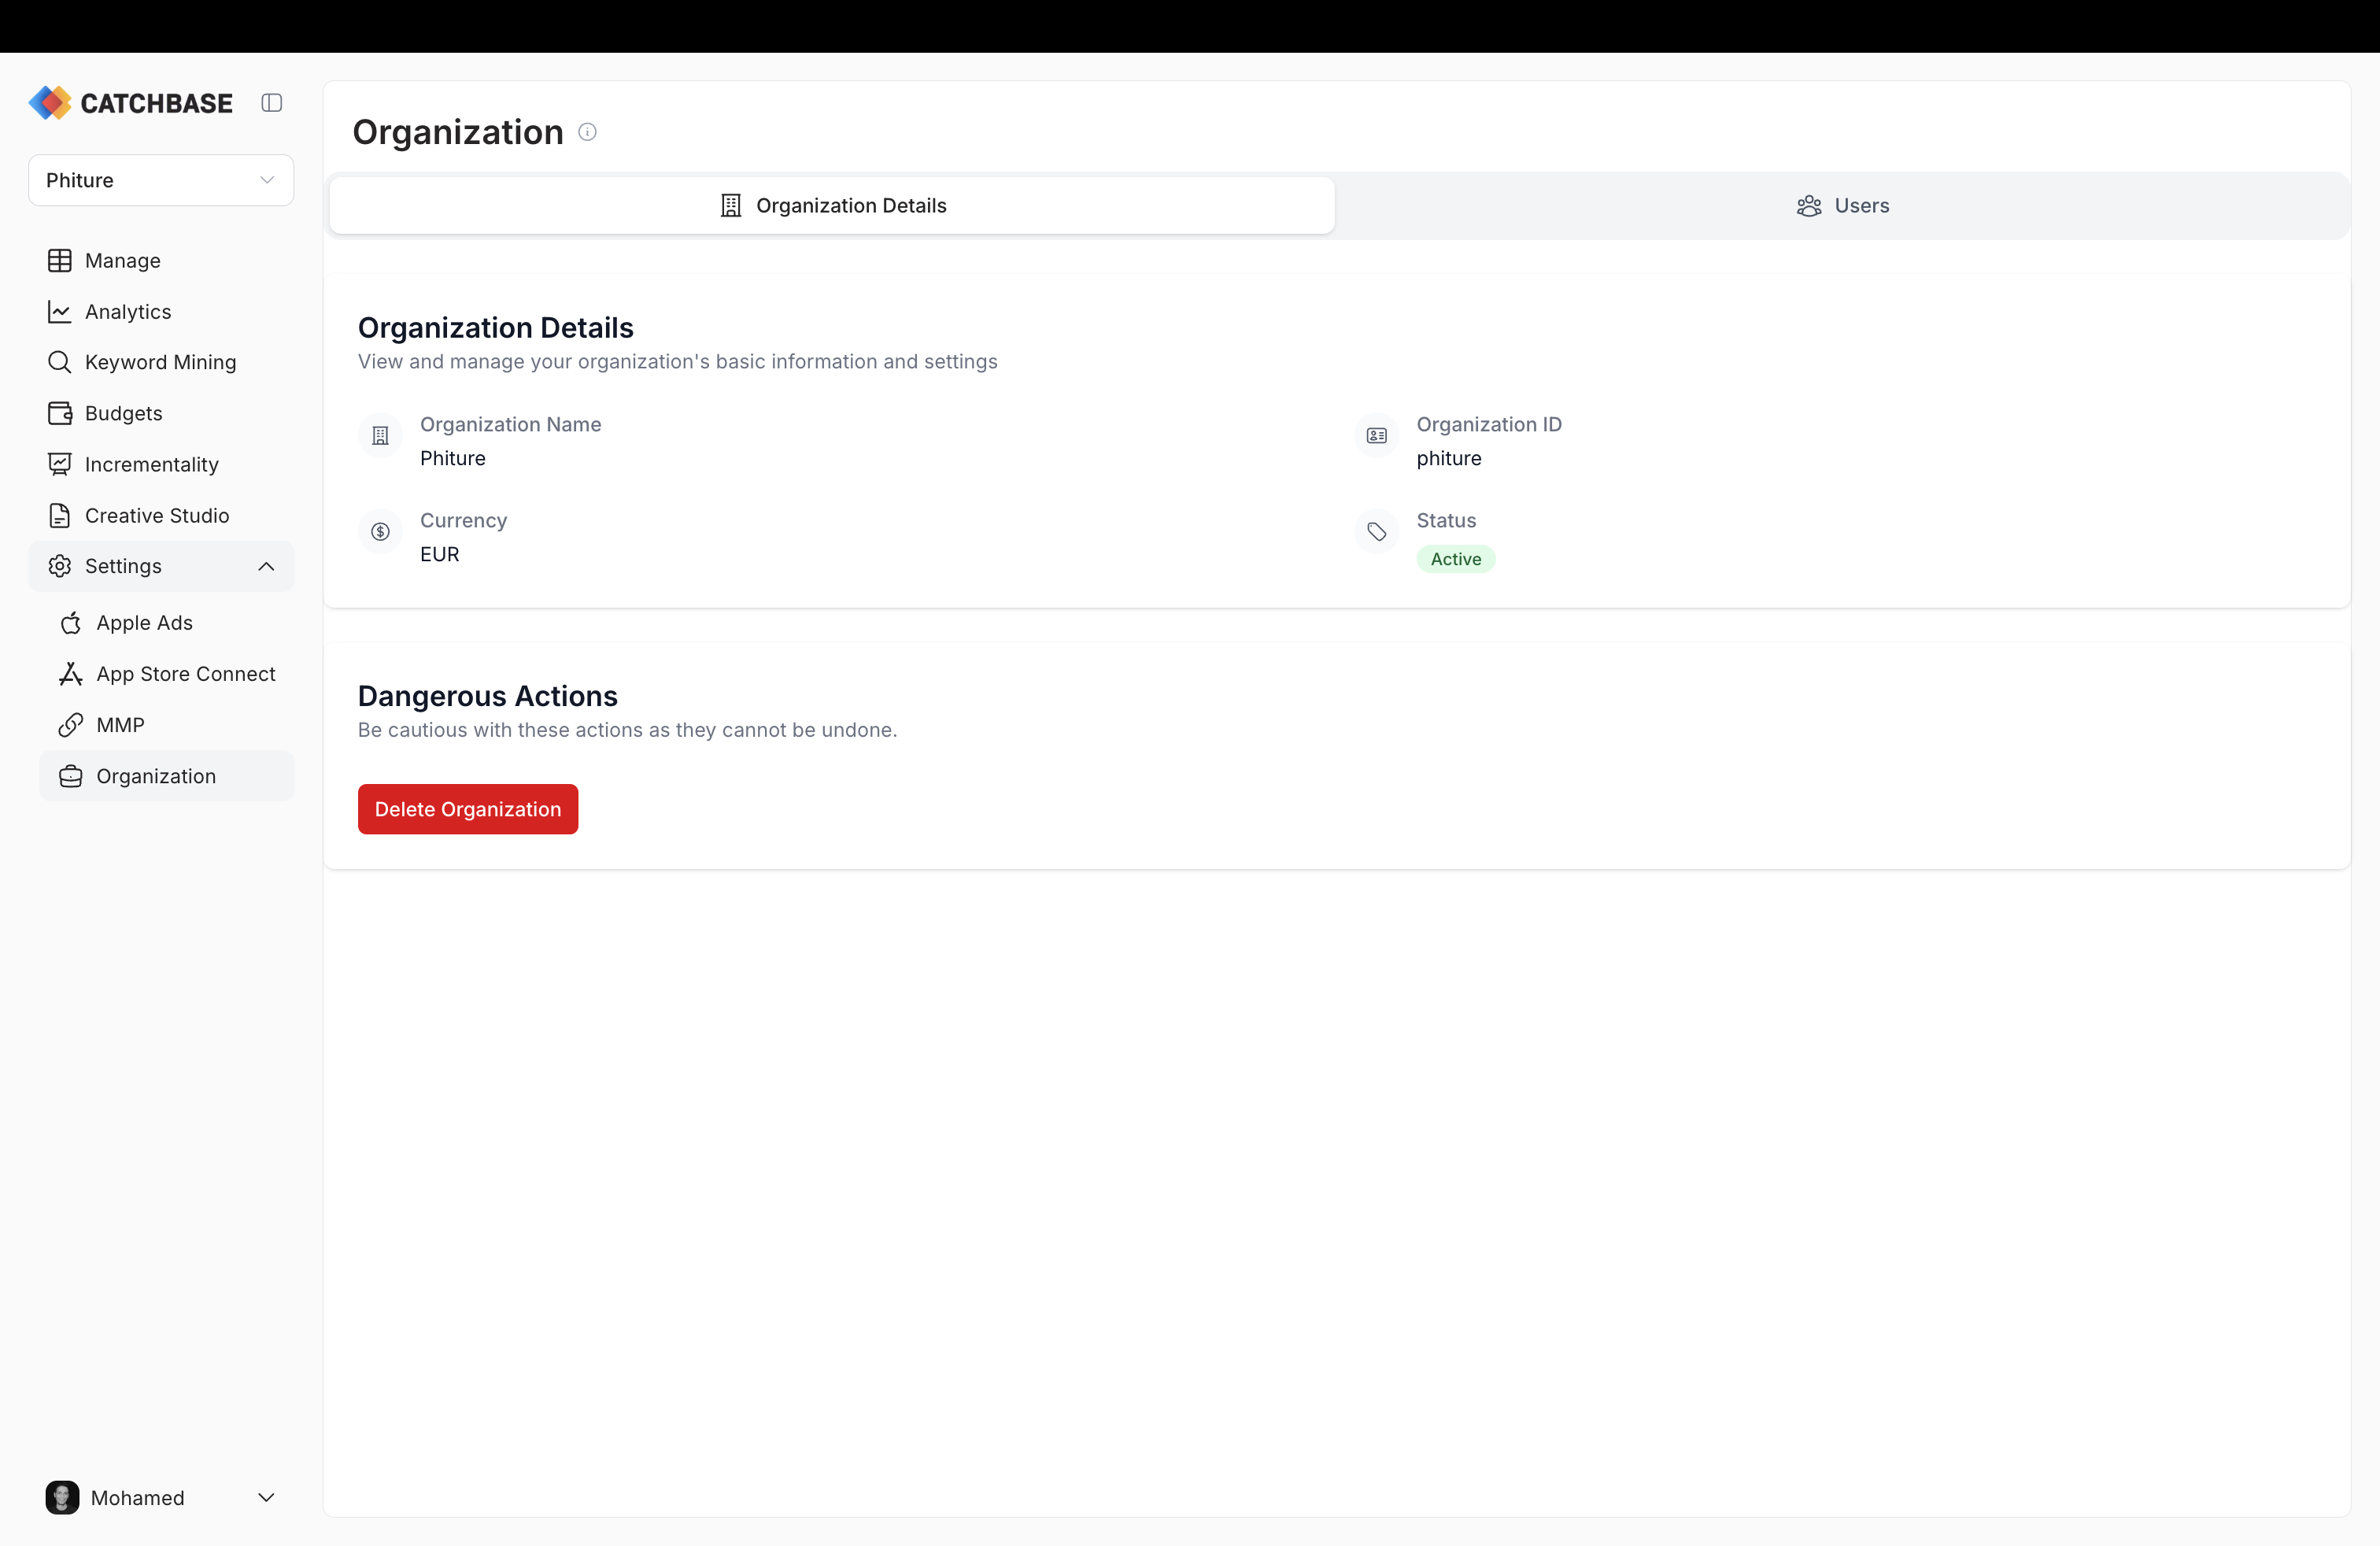
- Currency is read-only in this view and reflects the currency set at organization creation in Apple Ads. To change billing details, click Manage Billing to open the Stripe billing portal.
Time zone is not configurable. All reporting reflects UTC.
Invite teammates
Admin role is required to invite teammates. Editors and Viewers cannot send invitations.
- Go to Settings, Organization and open the Users tab.
- Click Invite User. A modal opens.
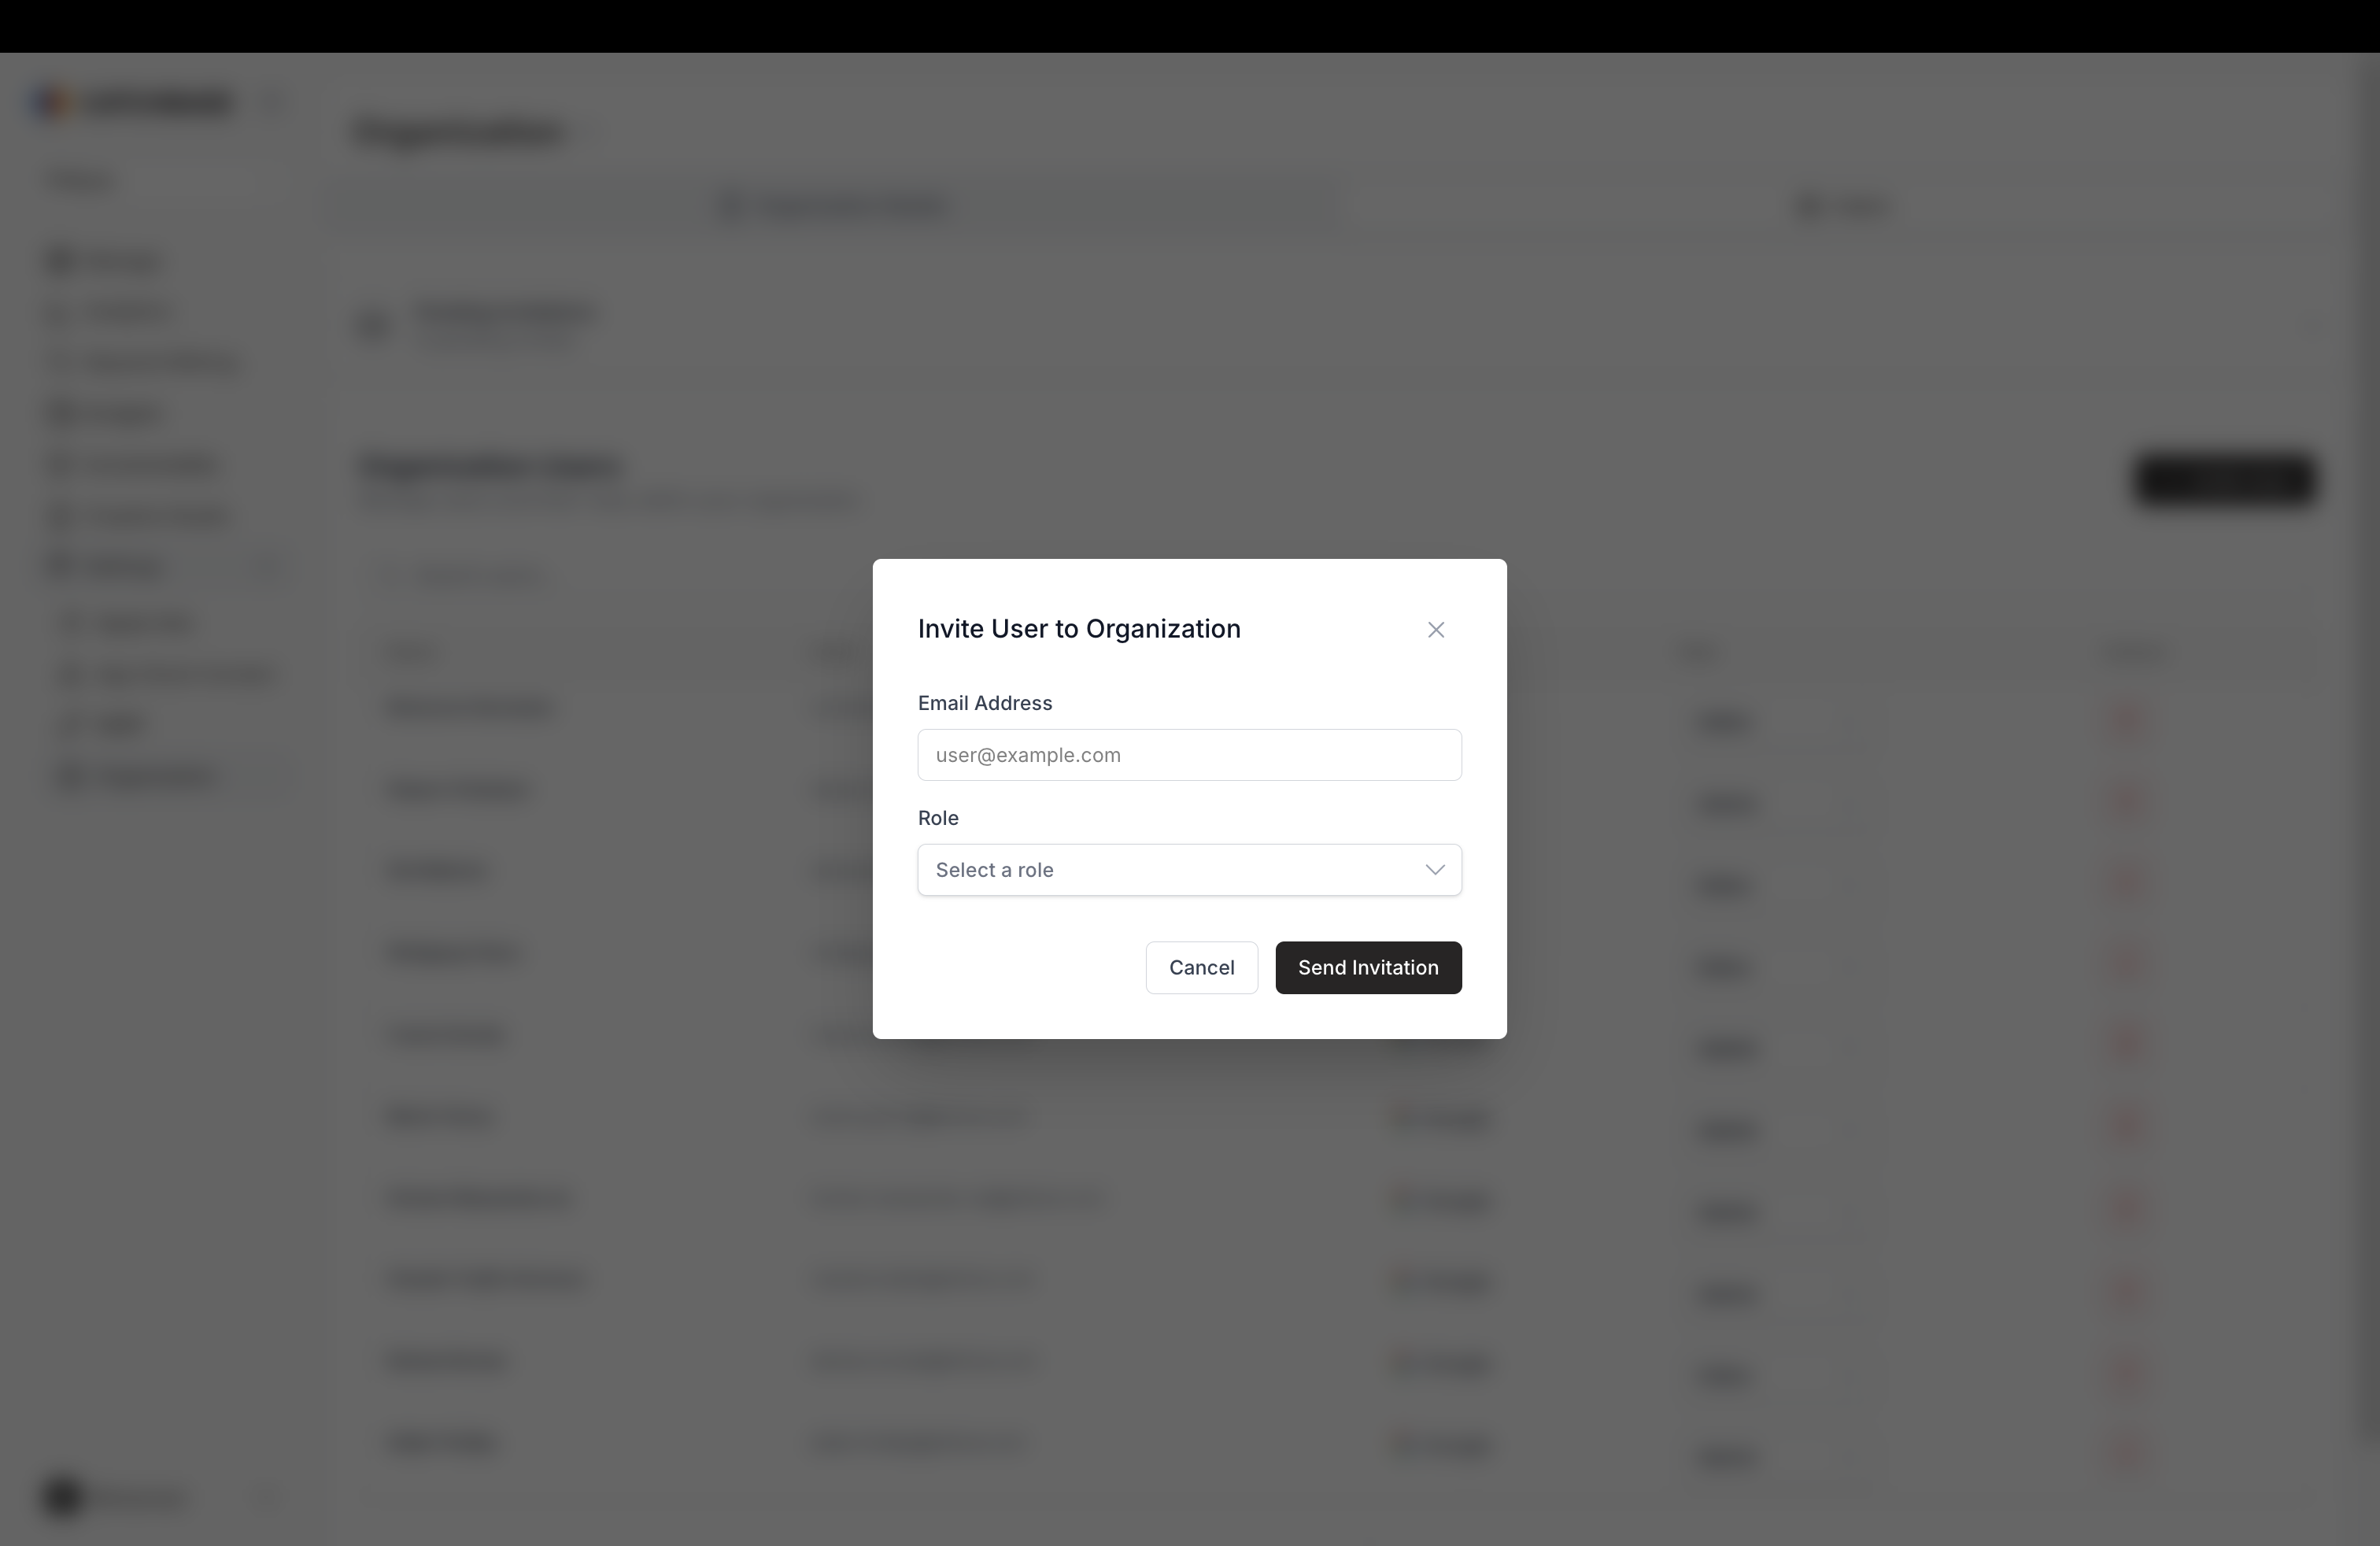
- Enter the invitee's email address.
- Select a role from the dropdown: Admin, Editor, or Viewer. For what each role can do, see User roles and permissions.
- Click Send Invitation. Expected outcome: the invitee receives an email and appears under Pending Invitations on the Users tab until they accept.
Manage pending invitations and existing users
- Pending Invitations appears as a collapsible panel above the user list when invites are outstanding. Expand it to see who was invited, by whom, and when.
- In the user list, click the role badge next to any user to change their role. Confirm the change in the modal. You can also remove a user with the trash icon.